
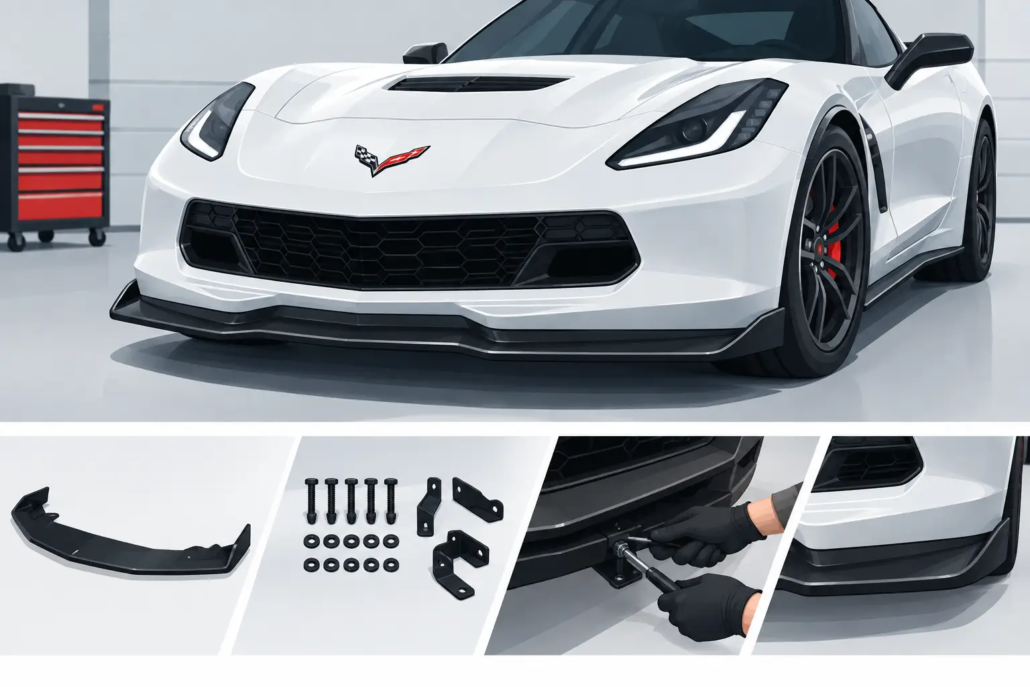
How to Install C7 Corvette Splitter the Right Way
A C7 Corvette splitter is not a cosmetic afterthought. It is the first thing people see when your car rolls in low, wide, and unapologetic – and the first thing that takes a hit when installation is rushed. Knowing how to install C7 Corvette splitter hardware correctly protects the finish, keeps the aero line sharp, and gives the front end the planted, race-inspired stance it was built to wear.
Whether you are fitting painted ABS, fiberglass, or hand-laid carbon fiber, the standard is the same: tight panel gaps, centered placement, concealed hardware where possible, and enough support to handle real street miles. This is a precision job. Treat it like one.
Before You Install a C7 Corvette Splitter
Start by confirming the splitter matches your exact bumper. A C7 Stingray, Z06, Grand Sport, and ZR1-inspired front conversion do not all share the same lower profile or mounting points. Even within one model range, aftermarket bumpers and existing front lips can change how a splitter sits. Never force a part into position because it looks close.
Inspect the splitter before bringing it near the car. On a premium carbon-fiber piece, look at the weave direction, clear coat, mounting flange, and every pre-drilled hole. Set it on a soft moving blanket or padded work surface. Do not place carbon fiber face-down on concrete, cardboard with staples, or a dirty shop floor. One careless drag can mark a finish that deserves better.
Clean the underside of the bumper thoroughly. Road film, tire dressing, and old adhesive residue can prevent double-sided tape from bonding if your splitter design uses it as an anti-rattle aid. Isopropyl alcohol on a clean microfiber works well for final surface prep. Let the area dry completely before test-fitting.
Your installation area matters too. Work on level ground with strong lighting. A drive-on lift is ideal because it supports the Corvette naturally while giving you room underneath. If you are using ramps or a floor jack, use properly rated jack stands at the factory lift points. Never trust a hydraulic jack alone under a low Corvette.
Tools that make the job cleaner
Most installations call for basic hand tools: a socket set, ratchet, trim clip tool, drill and correctly sized drill bits if the kit requires new holes, painter’s tape, measuring tape, masking marker, microfiber towels, and safety glasses. A second person is not optional on longer splitters. They can hold the centerline while you check each side, preventing the common mistake of tightening one corner and discovering the entire part has shifted.
If your splitter uses bolts, washers, lock nuts, or brackets, lay the hardware out first. Match every fastener to its intended location before you start. Do not substitute random hardware-store screws for supplied stainless hardware unless you know the load requirement and thread engagement are correct.
Test-Fit Before You Drill or Tape
The difference between a show-car installation and a compromised one usually happens before the first fastener goes in. Hold the splitter against the lower bumper with a helper and study it from several angles. Check the front edge, both corners, wheel-well transitions, and the center opening. The splitter should follow the factory bumper line without being bowed upward, pulled downward, or tensioned at either end.
Use painter’s tape to mark the center of the bumper and the center of the splitter. Align those marks first. Then measure from a fixed point on each side of the car, such as the edge of the lower grille opening or a bumper body line, to confirm the splitter projects evenly. Your eyes are useful, but measurements expose small errors that become obvious once the car is back on the ground.
On a carbon-fiber splitter, avoid overtightening during this stage. Carbon fiber is exceptionally strong for its weight, but its mounting flange can crack if hardware pulls it against an uneven surface. If a hole does not line up, stop and find out why. The problem may be a bumper variation, an old damaged mounting tab, or a part that needs minor professional adjustment. Forcing it is not craftsmanship.
How to Install C7 Corvette Splitter Hardware
Once your test-fit is centered and the mounting holes line up, begin with the center fasteners. Install them loosely enough to let the splitter move slightly. Then work outward, alternating from left to right. This distributes pressure evenly across the mounting surface and helps the splitter seat against the bumper without creating a wave or twist.
If the splitter uses factory holes and push clips, remove the original clips carefully with a trim tool rather than pulling them by hand. Reuse only clips that are undamaged and still grip firmly. For bolt-on installations, use washers where supplied to spread the load across the mounting flange. Nylon lock nuts or thread locker can help prevent vibration from loosening hardware, but use thread locker only where the manufacturer allows it.
Some splitters include support rods or braces. These are not just visual motorsport theater when the splitter has a deep extension or sees higher speeds. Mount the brackets exactly where instructed, ensuring the load is carried by a stable bumper structure rather than thin plastic alone. Support rods should be adjusted evenly, with no side pulling harder than the other.
If drilling is required, mark every hole while the splitter is held in its final position. Remove the splitter, verify the marks again, then drill a small pilot hole before stepping up to the final bit size. A pilot hole gives you more control and reduces the chance of the bit wandering across the bumper. Drill slowly and support the material from behind when possible.
Do not drill through the bumper with the splitter mounted unless the manufacturer specifically directs you to do so. You risk scratching the finish, damaging the carbon fiber, or elongating a hole that should stay precise.
Tighten in stages, not all at once
After all hardware is installed, tighten it in stages from the center outward. The goal is secure contact, not brute force. Stop when the splitter is firmly seated and the washer is snug. If the flange begins to distort, back off and inspect the fitment. A premium aero component should look integrated, not clamped into submission.
Once tight, step back several feet and look at the front end straight on. Check that each corner has the same projection and that the centerline still matches. Then get low and inspect from the side. The splitter should complement the Corvette’s body line, not point upward or sag at the outer edges.
Final Checks Before the First Drive
Turn the steering wheel lock to lock and verify there is no tire contact, especially if your C7 is lowered or running aggressive wheel and tire fitment. Check that the splitter clears the wheel-well liner, brake ducts, and any aftermarket canards. Look underneath for loose tabs, exposed hardware, or brackets near moving components.
Before driving, account for your new approach angle. A splitter changes the way you enter driveways, parking garages, loading ramps, and gas stations. Approach steep entrances diagonally whenever space allows. Slow down over road crowns and speed bumps. Carbon fiber makes a statement, but it is not an invitation to test it against every concrete curb in town.
After the first 25 to 50 miles, inspect the hardware again. Street vibration, heat cycles, and initial settling can reveal a fastener that needs a small adjustment. Recheck after your first highway run, especially with a deeper aero profile or support rods.
Keep the Finish Worth Looking At
Wash the splitter with the same care you give the rest of the car. Use pH-balanced car soap, soft wash media, and clean microfiber towels. Avoid harsh degreasers on exposed carbon-fiber clear coat unless the product specifically approves them. For carbon fiber, a quality paint sealant or ceramic protection can make bug removal easier and preserve the depth of the weave.
If the splitter scrapes, inspect more than the visible surface. A shallow mark may be cosmetic, but a deep impact can damage a mounting point or create a crack near a fastener. Catching that early is far better than losing a corner at speed.
A properly installed splitter does more than sharpen the nose of your C7. It sets the visual attitude for everything behind it. Take the extra time to align it with purpose, secure it with discipline, and let the Corvette arrive with the kind of road presence Ivan Tampi Customs was built to celebrate.
