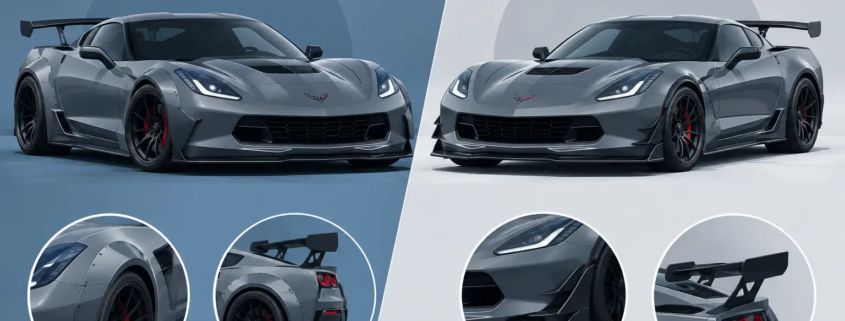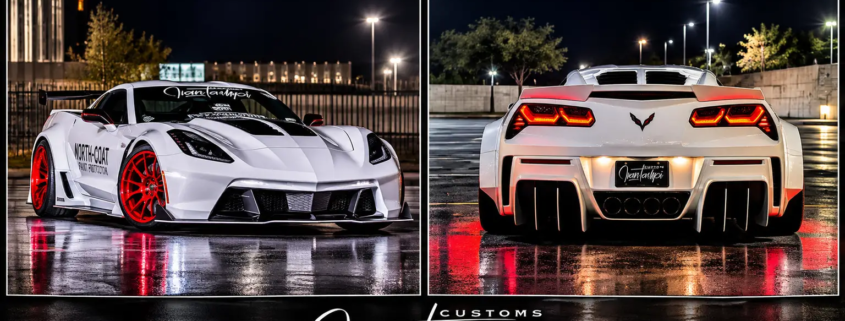
Ivan Tampi’s Black Widow Widebody Kit for Corvette C8

Ivan Tampi’s Black Widow Widebody Kit for Corvette C8

The stock C8 Corvette is already a mid-engine statement. Ivan Tampi’s Black Widow widebody kit for Corvette C8 takes that statement past factory limits, pushing the car toward the kind of low, planted, exotic presence that owns a show field before the engine even starts. This is not styling for the owner who wants to blend in at a Corvette meet. It is visual aggression with a purpose.

The Black Widow design language is built for drivers who see their Corvette as a canvas, not a finished product. Every widened surface, exposed-carbon detail, and race-inspired line has to work together. The goal is not to make a C8 merely look bigger. The goal is to give it a silhouette that feels designed from the ground up.

What Defines the Black Widow C8 Widebody Look

A true widebody conversion changes the visual architecture of the car. On a C8, that starts with the relationship between the fenders, quarter panels, rocker area, front fascia, and rear end. If those elements do not flow as one composition, the result can look like a collection of add-on parts. A Black Widow-inspired build demands a sharper standard.

The front end needs to sit low and wide, with air-management details that add menace without burying the C8’s factory character. The side profile is where the transformation becomes unmistakable. Wider fenders and sculpted rocker treatments visually lower the car, while the expanded rear quarters give the mid-engine Corvette the authority of a purpose-built exotic.

At the rear, the design has to finish with intent. A properly chosen diffuser, deck wing, or GT wing can add the final layer of motorsports attitude, but proportions matter. Too little rear aero and the build can feel unfinished. Too much wing for the rest of the package can turn an artistic widebody into a parts-bin statement. The right combination gives the C8 a rear view people remember.

Why Carbon Fiber Belongs on a C8 Widebody Build

Carbon fiber is not just a texture pasted onto a high-dollar sports car. When used correctly, it is a material that supports the entire visual mission. Its weave, depth, and finish create contrast against painted bodywork, while its lightweight reputation keeps it aligned with performance-car culture.

For a Black Widow-style C8, exposed carbon works best when it is intentional. A carbon-fiber splitter can visually pull the nose closer to the pavement. Carbon side skirts can connect the widened front and rear forms. A carbon rear diffuser or wing can give the back of the car a technical, track-focused finish.

There is a trade-off. Full exposed carbon makes a louder statement and rewards close inspection under show lighting, but it requires a higher level of care. Road debris, UV exposure, improper washing, and careless installation can compromise the finish over time. Painted carbon or painted composite sections may make more sense for an owner who wants a more unified color theme or drives the car hard on public roads.

The best material choice depends on the intended life of the car. A weekend showpiece can lean heavily into visible weave and high-gloss drama. A frequently driven C8 may benefit from strategic carbon accents paired with durable painted surfaces and paint-protection film in vulnerable areas.

Stance Is Where the Kit Becomes a Statement

A widebody without the right wheel and tire package is unfinished. The larger bodywork creates visual space that factory-width wheels cannot always fill. Wheel fitment must be planned with the kit, not selected after the panels are mounted.

Deep-concave forged wheels, proper offsets, and tire sizing that fills the arches without rubbing are central to the Black Widow attitude. The objective is a planted, muscular stance, not a wheel setup that looks pushed outward only for photographs. Wheel width, suspension height, alignment settings, brake clearance, and steering travel all need to be considered as one system.

Lowering the C8 can sharpen its posture, but lower is not automatically better. A car that scrapes on every driveway, damages an expensive splitter, or cannot clear a lift is not a finished build. Front-lift compatibility, street conditions, and how often the car will be driven should influence the final ride height.

A strong widebody build looks composed from every angle: front three-quarter, side profile, rear three-quarter, and the view from behind. That takes measurements, test fitting, and restraint. The right stance makes the car look fast even standing still.

Fitment Is the Difference Between Custom and Compromised

Premium bodywork deserves premium installation. That means panel alignment, clean transitions, consistent gaps, secure mounting, and correct surface preparation before paint or final carbon finishing. A widebody project is not the place to rush fabrication or hand the car to a shop that treats exotic composites like ordinary bumper covers.

The C8’s mid-engine layout and factory lines make proportion especially important. The rear quarter area carries much of the car’s visual weight, so widened panels must blend naturally into the door, roofline, rear fascia, and engine-bay area. The front must match that authority without appearing disconnected from the rear.

Before committing to a complete conversion, owners should think through the full build vision. Color choice, wheel finish, brake caliper color, interior accents, ride height, lighting, and aero all affect the finished result. Gloss black wheels may make exposed carbon feel more sinister. Brushed or polished forged wheels can take the build in a more exotic, high-fashion direction. A vivid paint color can make the widened surfaces impossible to ignore, while a darker finish puts more focus on contours and carbon weave.

This is why a complete design language matters. Ivan Tampi Customs has built its reputation around dramatic Corvette transformations that read as automotive art, not disconnected accessories. The Black Widow lineage is about creating a vehicle with a signature, not simply adding width.

Building for the Street, the Show, or Both

Every C8 owner has a different threshold for compromise. A car built primarily for shows can prioritize ground-hugging ride height, high-gloss exposed carbon, extreme wheel fitment, and a large rear wing. It can be unapologetically dramatic because its job is to stop traffic and collect attention.

A street-driven C8 needs a more balanced approach. Durable finishes, sensible clearance, secure mounting, protective film, and a wheel-and-tire package that behaves predictably on real pavement become more valuable. The car can still look ruthless without becoming fragile.

For owners who track their Corvette, the conversation changes again. Aero components should be selected for more than visual theater, and the added width must work with tire, suspension, cooling, and brake goals. A widebody can support a serious performance identity, but the entire setup has to be engineered around how the car will actually be used.

That is the beauty of a properly executed Black Widow C8 concept: it can be tailored without losing its identity. The details may change, but the mission stays the same – wider, lower, sharper, and impossible to mistake for stock.

A C8 Should Look as Serious as It Feels

The Corvette C8 moved America’s most recognizable sports car into exotic-car territory with its mid-engine proportions. A Black Widow widebody direction takes that opportunity and refuses to play it safe. It gives the car visual mass, carbon-fiber edge, and the kind of stance that makes people circle back for another look.

Build it with intention. Choose components that speak the same design language, give the installation the precision it deserves, and make every finish decision support the final silhouette. The right C8 widebody does not ask for attention. It takes it.
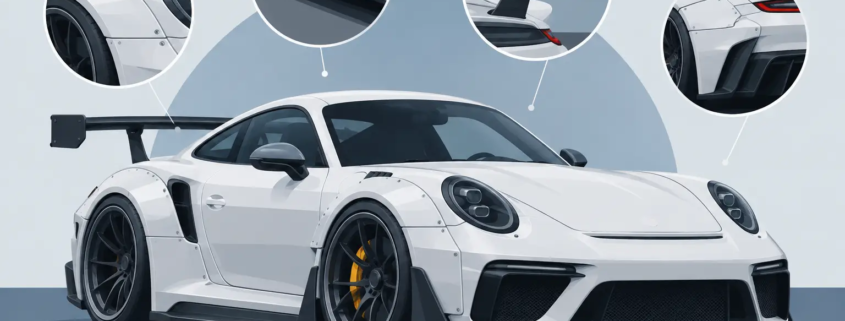

What Makes a Quality Widebody Kit Stand Out?

What Makes a Quality Widebody Kit Stand Out?

A widebody can turn a familiar performance car into something that stops traffic before the engine even fires. But bigger is not automatically better. What makes a quality widebody is the difference between a build that looks factory-engineered for the stage and one that looks like mismatched panels added in a hurry. The best kits create presence without sacrificing the body lines, panel gaps, wheel geometry, or attitude that made the car worth building in the first place.

For a serious owner, a widebody is not a cosmetic shortcut. It is a complete visual statement. Every flare, vent, edge, and transition has to earn its place.

What Makes a Quality Widebody Worth the Investment?

Quality starts long before carbon fiber is laid into a mold. It starts with design discipline. A widebody must feel connected to the vehicle’s original architecture, even when the finished car looks radically different from stock. The fender extensions need to carry the movement of the hood, doors, rocker panels, bumpers, and rear quarters instead of fighting them.

That is why a quality kit looks dramatic from every angle, not just in a carefully cropped photo. The front profile should introduce the new width with intent. The side view should have a clean visual flow from the front fender through the skirt and into the rear quarter. At the rear, the widened body needs to resolve around the bumper, diffuser, deck wing, and exhaust layout without looking swollen or unfinished.

A quality widebody does not simply make the car wider. It makes the car look lower, more planted, and more dangerous. Proportions are everything.

Wide Enough to Command Attention, Not Lose the Car

The strongest widebody designs exaggerate what is already special about the platform. A C7 Corvette, for example, has sharp creases, a low beltline, and an aggressive rear haunch. A properly designed conversion amplifies that DNA rather than burying it under random shapes.

Overbuilt arches can make a car look heavy if the rest of the design does not support them. Undersized side skirts leave the widened fenders hanging in space. A rear bumper that remains visually narrow can make even expensive quarter panels look like bolt-on accessories. This is why complete systems matter. The components must speak the same design language.

There is also a trade-off between visual impact and usability. Extreme width creates an unforgettable silhouette, but it can affect garage clearance, parking, road debris exposure, and wheel protection. The right answer depends on whether the vehicle is a showpiece, a weekend weapon, or a car that sees regular street miles. A quality manufacturer designs for the intended mission instead of pretending every build has the same requirements.

Fitment Is Where Premium Becomes Obvious

No material can rescue poor fitment. Carbon fiber may look exotic, but if the panel edges wave, the gaps wander, or the mounting points need excessive modification, the final build loses its authority.

High-level fitment begins with accurate molds and repeatable production. Mounting surfaces must align with the vehicle, and panel thickness needs to be consistent enough to support clean installation. Replacement bumpers, widened fenders, quarter panels, skirts, splitters, and spoilers should work as a system, with transitions that look intentional once the car is assembled and painted or clear-coated.

This does not mean any widebody conversion is a five-minute driveway install. Serious bodywork requires skill. Rear quarter conversions may demand cutting, bonding, reinforcing, blending, paint correction, and careful alignment by an experienced shop. The difference is that a quality kit gives that shop a strong foundation. It should not force the installer to redesign the part just to make it sit correctly.

Before committing, ask direct questions about fitment, required modifications, hardware, finishing expectations, and professional installation. A seller that understands its product can explain where the work lives and what the finished result should require.

Carbon Fiber Must Be More Than a Marketing Label

Carbon fiber is one of the most striking materials in custom automotive design, but not all carbon fiber parts are created equal. A premium widebody component should have intentional layup, consistent weave where exposed, properly controlled resin, and enough structure to hold its shape under real use.

Hand-laid carbon fiber carries a different level of craftsmanship than a thin cosmetic skin. The visual payoff is obvious when the weave runs cleanly across a hood, flare, splitter, or wing. More importantly, the part needs proper rigidity and stable mounting areas. Flimsy panels can flex, crack around fasteners, distort in heat, or reveal uneven surfaces once light hits them at a car show.

Finish matters just as much. Exposed carbon should have depth, clarity, and a finish that complements the rest of the vehicle. Painted carbon needs straight body lines and stable surfaces underneath the color. Whether the goal is a full exposed-carbon build or a color-matched widebody with carbon accents, the material should look like automotive art, not a rough composite experiment.

Wheel and Tire Fitment Complete the Statement

A widebody without the right wheel and tire package is unfinished. The added width exists for a reason: to create a more commanding stance and, when the build calls for it, support wider rolling stock. If the wheels sit too far inside the arches, the car loses the muscle the conversion was built to create. If the wheels poke too far out, the build can look careless and become difficult to drive.

Offset, wheel width, tire section width, ride height, camber, suspension travel, and steering clearance all work together. There is no universal wheel specification that fits every widebody build. Brake setup, coilovers, air suspension, and intended ride height change the equation.

The goal is controlled aggression. At rest, the wheel should fill the arch with purpose. In motion, the tire needs clearance through compression and steering travel. A professional measurement process before ordering wheels can prevent expensive mistakes after the body is already installed.

Aero Details Need a Job Beyond Looking Fast

Splitters, canards, diffusers, vented fenders, deck wings, and GT wings can make a widebody unforgettable. They can also ruin a design when they are added without proportion or purpose. Good aero accessories extend the language of the body rather than competing for attention.

On a street-driven show car, visual balance may be the main priority. On a track-focused build, airflow management, mounting strength, and real downforce considerations carry more weight. A tall wing may deliver the race-car profile an owner wants, but it needs proper brackets and reinforcement. A front splitter needs enough strength to survive real road use, not just look sharp in the studio.

The best builds choose aero as part of one composition. The front end, side profile, and rear of the car should look connected. That is why a complete design lineage carries more presence than a collection of unrelated aftermarket parts.

The Installer Is Part of the Quality Equation

Even the finest body kit can be compromised by rushed preparation or weak paintwork. Panel alignment, bonding, seam finishing, paint blending, clear-coat correction, and final assembly all determine whether the car looks elite under harsh sunlight and close inspection.

Choose a shop that has experience with composite panels and understands show-car standards. Ask to see completed work from multiple angles, including door gaps, bumper transitions, rocker alignment, and exposed-carbon finishes. A shop that only photographs a car from twenty feet away may not be the shop for a high-dollar widebody conversion.

Ivan Tampi Customs approaches this category as automotive art, and that standard should continue through the entire build. The body kit, wheels, aero, paint, lighting, and interior details need to feel like one vision when the car rolls out.

Exclusivity Gives the Build Its Lasting Power

A quality widebody should not only look impressive on delivery day. It should still feel special after the first wave of attention fades. Limited-production design, recognizable styling cues, and a defined artistic point of view give a build that staying power.

There is nothing wrong with choosing a subtle conversion, but an exceptional widebody does not apologize for being seen. It transforms the car into a signature piece. When the proportions are right, the fitment is precise, the carbon fiber is properly crafted, and every component shares the same visual direction, the result does more than turn heads. It gives the owner a car people remember long after it has left the show field.

Corvette GT2 Wing Review for Serious C7 Builds

Corvette GT2 Wing Review for Serious C7 Builds

A Corvette can wear plenty of rear spoilers and still look factory-adjacent. A properly chosen GT2 wing does the opposite. This Corvette GT2 wing review is for the owner who wants the rear of a C7 to carry the same authority as the front splitter, side skirts, diffuser, wheels, and stance – not disappear behind them.

The right wing is not a casual accessory. It changes the entire silhouette from the rear three-quarter view, draws the eye across the roofline, and gives the car a more deliberate motorsport profile. Get it right and the Corvette looks lower, wider, and more expensive. Get it wrong and even a beautiful carbon-fiber piece can look disconnected from the build.

Corvette GT Wing Review: What It Changes

A GT2 wing creates a visual centerline above the deck lid. That matters on the C7 because the factory body already has sharp shoulders, angular taillights, and a rear fascia designed around horizontal width. A wing adds height and technical aggression, but its best work is often in how it finishes the car’s proportions.

On a stock-body Stingray or Grand Sport, a moderate-height GT wing can give the rear end a race-inspired edge without swallowing the factory lines. On a wider, more dramatic build, the wing has a different job: it must hold its own against enlarged quarters, a deep diffuser, and a front end that makes a serious statement. A small lip spoiler can look lost in that environment. A well-sized GT wing gives the complete build visual balance.

This is why wing selection should happen early, not after every other exterior part has already been installed. Rear aero needs to speak the same design language as the rest of the car. The endplates, pedestal shape, blade profile, and carbon weave all contribute to whether the result looks designed or simply added on.

Carbon Fiber Is More Than the Finish

Real carbon fiber is part of the appeal, especially on a Corvette built to stand apart at shows, meets, and rolling events. The weave gives the wing depth that painted plastic cannot duplicate. Under direct sun or parking-lot lights, quality carbon creates a layered visual texture that makes the piece feel like automotive art rather than a generic aftermarket spoiler.

But appearance is only half the review. Construction and finish determine whether that carbon continues to look elite after months of heat cycles, washing, road debris, and exposure. A premium wing should have consistent weave alignment across visible surfaces, clean edges, a high-quality clear coat, and mounting areas built to support the hardware without feeling thin or unfinished.

Carbon fiber also brings a practical advantage: low weight. That does not magically turn every street Corvette into a track weapon, but reducing unnecessary mass high on the car is never a bad direction. More importantly, a lighter, purpose-built wing avoids the bulky feel that can come from poorly executed alternatives.

For owners who want a painted body-color build, carbon can still be the right material underneath. The decision comes down to the theme. Exposed carbon works best when it is repeated with intention – perhaps through a front splitter, side skirts, rear diffuser, mirror caps, or a carbon interior detail. One isolated carbon wing on an otherwise uncoordinated car can look like an afterthought. A connected carbon package looks commanding.

Street Presence Versus Functional Aero

The question always comes up: does a GT wing add downforce? The honest answer is that it depends on the wing’s profile, angle, dimensions, mounting height, vehicle speed, and how the rest of the car manages airflow. Functional aero is a system. A rear wing cannot be judged as if it operates alone.

At track speeds, a properly engineered wing can contribute meaningful rear stability and aerodynamic load. Yet an aggressive angle can also increase drag, and a mismatched setup can alter the car’s balance in ways that are not automatically beneficial. If the car sees serious circuit use, the wing should be selected and adjusted with the total package in mind: front splitter, underbody airflow, tire setup, alignment, suspension, and driving goals.

For many Corvette owners, though, the primary return is visual. There is nothing shallow about that. A high-end custom build is meant to create a reaction. It should look lethal pulling into a show, parked outside a restaurant, or rolling through the city at night. The GT wing gives the C7 a competition-bred signal before the exhaust even speaks.

The key is being clear about the mission. If you need measurable track performance, prioritize proven aero geometry and professional installation. If you are building a show-stopping street car, prioritize proportion, materials, finish, and how the wing completes your Corvette’s overall identity. The strongest builds can do both, but they do not pretend those goals are identical.

Fitment Is the Difference Between Premium and Problematic

A wing can have an excellent shape and still fail the build if fitment is careless. Deck-lid curvature, pedestal placement, hardware access, and the way the blade sits relative to the rear glass all deserve attention. On a C7, the rear end is too sculpted to forgive awkward gaps or a wing that looks slightly crooked from behind.

Before installation, confirm exact model-year and body-style fitment. A part intended for one Corvette configuration should not be forced onto another just because it is close. Check whether the wing requires drilling, whether reinforcement is needed beneath the deck lid, what mounting hardware is included, and how the installation affects existing spoilers or trim.

Professional installation is worth serious consideration on a premium carbon-fiber part. Measuring the mounting locations correctly, protecting painted surfaces, sealing drilled areas when applicable, and torquing hardware properly are not details to rush. A wing that sits perfectly level and secure looks expensive because it is installed like it belongs there.

Also consider the daily realities. Higher wings can slightly affect rearward visibility, complicate certain car covers, and draw more attention from everyone around the car. For some owners, those are nonissues. For others, a lower-profile spoiler may better suit a Corvette driven every day. There is no universal answer, only the build you want to live with.

Choosing the Right GT2 Wing for Your Corvette

The best Corvette GT2 wing is the one that matches the car beneath it. A factory-bodied C7 with stock ride height may need restraint, while a lowered Corvette on forged wheels can handle a more assertive blade. A widebody build demands even more conviction. When the car carries widened fenders, carbon side skirts, a deep front splitter, and an aggressive rear diffuser, a timid rear spoiler can weaken the entire composition.

Pay close attention to three visual relationships: the wing’s width versus the rear body, the height versus the roofline, and the endplates versus the rest of the car’s sharpness. A wing that is too narrow can make a wide Corvette feel visually top-heavy. One that sits excessively high may overpower a refined build. Endplates that are too plain can feel generic, while overly busy shapes can clash with the C7’s already aggressive surfaces.

This is where designer-led aero makes a difference. Ivan Tampi Customs approaches Corvette styling as a complete visual language, where carbon-fiber components are not random upgrades but parts of a signature, show-car-level transformation. The goal is not to make a Corvette merely louder. The goal is to make it unmistakable.

The Verdict for C7 Owners

A GT2 wing is one of the fastest ways to change how a Corvette is perceived, but it deserves more thought than a quick add-to-cart decision. The best examples add authority without compromising proportion, showcase carbon fiber without relying on it as a gimmick, and support the car’s real purpose – whether that is track days, weekend drives, or taking center stage at a show.

Choose the wing after you have defined the personality of the build. If your C7 is meant to look wider, lower, sharper, and impossible to confuse with stock, the right GT wing is not the finishing touch. It is the piece that makes the whole rear end mean business.

C7 Widebody Versus Aero Kit: Which Fits You?

C7 Widebody Versus Aero Kit: Which Fits You?

A C7 Corvette does not need much help to get noticed. The real question is what kind of statement you want it to make when it arrives. In the C7 widebody versus aero kit decision, one path changes the entire silhouette of the car; the other sharpens the factory body into something lower, faster, and more intentional. Both can look serious. Only one may match the build you have in your head.

This is not simply a choice between more parts and fewer parts. It is a choice between a visual evolution and a full visual takeover. A properly executed aero kit respects the Corvette’s original proportions. A widebody conversion rewrites them.

C7 Widebody Versus Aero Kit: The Real Difference

An aero kit works with the factory body lines. Think front splitter, side skirts, rear diffuser, deck spoiler, rear wing, canards, and carbon-fiber accents. These parts add aggression at the edges of the car, where a low stance, forged wheels, and proper wheel fitment can make a factory-bodied C7 look dramatically more exotic without changing its basic width.

A widebody system goes much further. Widened front fenders and rear quarter panels create a new shoulder line, pull the eye outward toward the wheels, and give the car the planted visual authority associated with race cars and high-end exotics. Replacement bumpers, skirts, splitters, spoilers, and related components make the design read as one complete vehicle instead of a collection of add-ons.

That distinction matters because the best builds have a point of view. A C7 with a clean aero package can look like a factory special edition Chevrolet never released. A C7 with a dramatic widebody is not trying to blend in at a Corvette meet, on a show field, or under the lights at a cruise night. It is built to own the frame.

Choose an Aero Kit When the Factory Shape Is the Star

The C7’s original body is already muscular, especially on wide-fender models. If you love the stock proportions but want more menace from every angle, an aero kit is usually the smarter first move. A deep front splitter visually lowers the nose. Side skirts connect the car’s profile to the pavement. A diffuser and rear wing finish the rear with a more purposeful, track-inspired attitude.

This route is also more flexible. You can build in stages, beginning with the component that solves the visual weakness you notice most. Maybe the rear needs more presence. Maybe the front needs a lower, more exotic profile. Maybe your car already has wheels you love, and it only needs carbon-fiber details to tie the look together.

An aero-led build makes sense for owners who drive their C7 often, want to preserve the factory panel layout, or prefer an elevated OEM-plus appearance. It can be less invasive than a full conversion, easier to plan around existing paint and bodywork, and more forgiving if you are not ready to commit to wider wheels and tires.

But restraint still requires discipline. Randomly mixing splitters, skirts, wings, and overlays from unrelated design languages can make an expensive Corvette look unfinished. The parts should share a common visual language: matching carbon weave, compatible angles, and a front-to-rear balance that looks intentional at a standstill.

Choose a Widebody When Stance Is Non-Negotiable

Widebody is for the owner who looks at a stock C7 and sees unused space around the wheels. It is for the build where the tires need more visual authority, the hips need more drama, and the car needs to read differently before anyone notices the badge.

The biggest advantage is proportion. A wider body allows a more commanding wheel-and-tire package, but the goal is not simply to fit the widest possible wheel. The goal is to create a relationship between wheel, tire, fender, ride height, and body contour that looks engineered. When those elements are right, the C7 appears lower, wider, and more expensive from every angle.

A complete system is especially powerful because it gives the build continuity. Ivan Tampi Customs’ limited-edition XIK Widebody Kit is a 14-piece hand-laid carbon-fiber system designed around that total transformation: replacement bumpers, widened fenders and quarter panels, side skirts, spoilers, and splitters that speak the same aggressive design language.

The trade-off is commitment. A widebody build is a project, not a weekend accessory install. It can involve paint preparation, panel alignment, professional installation, wheel fitment planning, suspension choices, and a realistic understanding of how low the car can sit on the roads you actually drive. The results can be extraordinary, but premium bodywork deserves premium execution.

Widebody Wheel Fitment Cannot Be an Afterthought

Do not order a widebody kit, then treat wheels as an afterthought. The wheel setup is part of the body design. Barrel clearance, offset, width, tire profile, brake clearance, suspension travel, and final ride height all need to be considered before the car is assembled.

A wheel that technically fits can still look wrong. Too conservative, and the widened fender loses its impact. Too aggressive, and you risk rubbing, awkward tire stretch, or a stance that sacrifices the clean lines you paid to create. This is where experienced fabrication and alignment work separates a show-car-level build from a car that only photographs well from one side.

Carbon Fiber Changes More Than the Finish

Carbon fiber is not just a dark pattern placed on top of a Corvette. On the right build, it creates contrast, texture, and a motorsport edge that paint alone cannot duplicate. Exposed carbon around a front splitter, side skirt, diffuser, spoiler, or wing can make the body look lighter and more technical, especially against a bright paint color.

Still, exposed carbon needs a plan. A full carbon exterior can be ruthless and exotic. A painted widebody with exposed-carbon aero can create a sharper contrast between sculpture and hardware. Color-matched components can make the body appear more unified and OEM-like, while carbon focal points draw attention to the most aggressive geometry.

Material quality and finish matter at this level. Consistent weave, clean edges, panel rigidity, precise mounting surfaces, and proper clear coat are not minor details. They are the difference between automotive art and a cosmetic compromise. On a premium C7 build, every surface is under scrutiny.

Cost, Installation, and Daily Use

An aero kit generally creates a lower entry point because you can purchase and install components as the build evolves. It is a strong option when you want a high-impact visual return without taking the car offline for a major transformation. Yet quality aero is not automatically inexpensive once you add paint, installation, hardware, possible repair work, and the supporting changes needed to make it sit correctly.

A widebody carries a higher project cost because it asks more from the car and the installer. Beyond the body components, budget for bodywork, paint or carbon finishing, wheels, tires, mounting hardware, alignment, and possible suspension adjustments. If the goal is a complete show build, lighting, interior carbon, steering-wheel upgrades, and rear aero may also become part of the vision.

Daily driving changes the answer. Front splitters and low side skirts demand awareness around driveways, steep ramps, parking blocks, and rough pavement. A wider body can change how you judge the car in tight spaces. None of that means a widebody C7 must live on a trailer. It means the owner should build for the life the car will actually lead, not only for the photo shoot.

The Best Choice Depends on the Reaction You Want

Choose aero if you want people to look twice at a Corvette they recognize, then realize why it looks so much more serious. Choose widebody if you want people to stop, walk around it, and question whether it started life as a Corvette at all.

There is no weak option when the parts are designed with purpose and installed with precision. The mistake is buying for a temporary mood instead of building around a clear identity. Study your car from the side, the rear three-quarter, and the front at ride height. Decide whether it needs sharper edges or a new silhouette, then give the build the parts, wheels, and craftsmanship that vision demands.

Best Corvette C8 Stingray Rear Diffuser Guide

Best Corvette C8 Stingray Rear Diffuser Guide

A C8 Stingray has supercar proportions from the factory, but its rear view can still leave serious visual potential on the table. The best Corvette C8 Stingray rear diffuser is not simply the most aggressive piece with the most fins. It is the diffuser that fits your exact rear fascia, matches the attitude of the rest of the build, and looks intentional from every angle – parked, rolling, or staged under show lights.

For a Corvette owner building beyond factory-spec, the diffuser is where the rear end stops looking like an OEM bumper and starts looking like a finished design. It frames the exhaust, lowers the visual center of the car, and gives the C8 the planted, race-bred posture its mid-engine layout deserves.

What Makes the Best Corvette C8 Stingray Rear Diffuser?

A great C8 rear diffuser has to do three jobs at once: complete the rear styling, hold up to real road use, and install with clean, confident fitment. Miss one of those, and even expensive carbon fiber can look like an afterthought.

Design comes first. The C8 already has angular taillights, deep side intakes, and a wide rear stance. A diffuser should amplify those lines rather than fight them. Look for contours that pull the eye outward toward the rear corners and downward around the exhaust area. A properly designed diffuser makes the car look lower and wider without requiring a radical bumper conversion.

Material and construction are equally important. Real carbon fiber delivers the visual depth enthusiasts expect from a premium build: woven texture, changing reflections, and a finish that belongs alongside carbon side skirts, spoilers, and aero accents. But carbon is only as impressive as its layup, edge finishing, mounting points, and clear coat. Thin material, uneven weave, rough cutouts, and vague fitment claims are red flags.

Finally, the best choice has a clear purpose. A subtle gloss-carbon lower valance may be right for a clean street build on forged wheels. A deeper diffuser with pronounced vertical strakes may suit a car wearing a tall wing, front splitter, and track-influenced stance. Bigger is not automatically better. Cohesion wins.

Start With Fitment, Not the Finish

The fastest way to waste money is ordering a rear diffuser based on photos alone. C8 parts can look similar online while being designed for different bumper configurations, exhaust arrangements, trim levels, or aftermarket bodywork.

Before selecting a piece, confirm the model year listed by the manufacturer and identify your exact rear-end setup. Check whether the diffuser is intended for a standard Stingray fascia, a Z51-equipped car, a high-wing configuration, or a particular exhaust layout. If your C8 has an aftermarket rear bumper, modified exhaust tips, or prior carbon additions, factory fitment assumptions no longer apply.

Coupe and convertible ownership can matter too, even when the lower bumper appears similar. Product descriptions should state application clearly instead of relying on a generic “fits C8 Corvette” label. That wording is too broad for a premium component that needs to sit flush against painted bodywork.

Ask where the piece mounts and what hardware is required. A diffuser that uses factory mounting locations can make installation cleaner and more reversible. A more involved design may require additional fasteners, minor trimming, or professional installation. None of those options is inherently wrong. The right answer depends on whether your build is a weekend showpiece, a regularly driven street car, or a more committed custom project.

Check the Exhaust Relationship

The exhaust opening is the visual center of the C8’s rear fascia. It deserves close attention. The diffuser should create a deliberate border around the tips, with enough clearance to account for heat, vibration, and movement under load.

Do not assume a diffuser designed around stock exhaust will suit larger aftermarket tips. An opening that is too tight looks forced and can become a headache during installation. An opening that is too large can make the exhaust look undersized. This is one of the details that separates a catalog-style modification from automotive art.

Carbon Fiber, Painted Finishes, and Real-World Use

Carbon fiber is the natural choice when the rest of the build calls for visual depth and exotic character. On a C8, gloss carbon creates sharp contrast against bright paint colors and gives darker cars a rich, layered finish. Matte or satin carbon can work especially well on a stealth-focused build, but it needs to match the finish language used elsewhere on the car.

A painted diffuser can be the better move when you want the rear fascia to read as one sculpted form. Body-color paint makes the car look cleaner and more OEM-plus, while satin black can add contrast without putting carbon weave at the center of the design. There is no universal winner. The best material is the one that supports the full exterior plan.

For a car that sees regular highway miles, focus on durability as much as appearance. The rear diffuser lives close to heat, rain, road debris, curbs, steep driveways, and careless parking blocks. Quality clear coat and clean edge treatment matter because they protect the part and preserve the finish after the first few thousand miles.

Carbon requires sensible care, not panic. Wash it with the same attention you give premium paint, avoid harsh abrasives, and inspect the underside after any scrape. If your C8 sits extremely low, accept the trade-off: a dramatic rear aero profile may require more discipline entering driveways and loading the car onto a trailer.

Choose a Style That Matches the Whole Build

A rear diffuser should never be selected in isolation. Stand behind your C8 and look at the visual weight of the entire car. If the front remains factory smooth, an ultra-deep rear diffuser with oversized fins can make the car feel unbalanced. If the car has a front splitter, carbon rocker extensions, lowered suspension, and a wing, a more aggressive rear treatment can tie the entire profile together.

There are three broad directions most Stingray owners take. The first is refined OEM-plus: restrained fins, clean carbon, and factory-like integration. The second is exotic street: deeper channels, stronger angles, and a finish designed to command attention at cars and coffee. The third is full show-car aggression: pronounced strakes, coordinated wing hardware, wide wheels, and a rear end built to dominate the camera frame.

Ivan Tampi Customs approaches exterior components from that last-minded perspective: the car should look designed, not merely modified. Even if you are not building a full custom C8, that principle is worth carrying into every purchase. Select parts with a shared language of angles, materials, and finish.

Aerodynamics: Know What You Are Buying

The word “diffuser” gets used loosely in the aftermarket. A true aerodynamic diffuser works with underbody airflow, ride height, exit angle, and the surrounding aero package. On a street-driven C8 with a mostly factory underbody, many aftermarket diffuser upgrades are primarily visual components with potential airflow benefits that vary by design and setup.

That does not reduce their value. Styling is a legitimate reason to upgrade, especially on a Corvette built for presence. Just avoid buying based on wild downforce claims without data. If track performance is your priority, consider the rear diffuser as one part of a system that includes front aero balance, alignment, tire choice, suspension setup, and cooling needs.

Installation Details That Protect the Finish

A premium diffuser deserves a careful installation. Clean the bumper thoroughly, test-fit the part before drilling or applying tape, and make sure every edge sits naturally against the fascia. Never force carbon fiber into position with a fastener. Pressure can create stress points, distort the weave, or crack a mounting tab over time.

Use the specified hardware, tighten it evenly, and confirm exhaust clearance once the car is fully settled on the ground. If the diffuser includes adhesive tape, surface preparation and temperature matter. Tape is not a substitute for proper mounting where hardware is required, but it can help secure a clean, flush perimeter.

Professional installation is a smart investment if the diffuser requires fascia removal, drilling near painted surfaces, or adjustment around an aftermarket exhaust. The part may be the statement, but the installation determines whether it looks like it belongs there.

Spend for Design, Not Just Carbon

Cheap carbon can photograph well from six feet away. Up close, the differences show: inconsistent weave alignment, cloudy clear coat, exposed edges, poor hardware, and fitment gaps that collect dirt. A rear diffuser is positioned too low and too visibly to hide those compromises.

The best purchase is usually the one with transparent fitment information, detailed images, proper mounting provisions, and a design that still looks right after the excitement of unboxing wears off. Consider the diffuser as a permanent part of the C8’s silhouette, not a temporary accessory.

When the rear end looks lower, wider, and more intentional without competing with the rest of the car, you found the right piece. Build the C8 you want to walk back to after every parking spot – and make sure the view from behind leaves no doubt it is yours.

Corvette Car Show Build for Real Spotlight

Corvette Car Show Build for Real Spotlight

A serious Corvette car show build is not a pile of expensive parts. It is a visual statement with a point of view. When the doors open, the stance, body lines, carbon weave, wheel fitment, and paint finish need to hit as one composition. If one piece looks accidental, the entire car loses force.

The difference between a modified Corvette and a show-stopping Corvette is discipline. Factory bodywork is already recognizable. A winning build pushes that familiar silhouette into something lower, wider, sharper, and impossible to confuse with the car parked next to it.

Start With a Corvette Car Show Build Vision

Before ordering a splitter, wheel, or wing, decide what your Corvette is meant to be. An exotic-inspired widebody car calls for aggressive proportions, exposed carbon fiber, deep-concave wheels, and a stance that looks planted before the engine starts. A clean OEM-plus build requires restraint, with fewer changes and much tighter attention to finish quality.

Trying to combine every trend usually creates a car with no identity. A massive GT wing, chrome wheels, bright graphics, air suspension, and a luxury-style interior can work together only when the theme supports them. The best builds make every modification feel inevitable.

For a C7 Corvette, the body conversion often establishes the entire direction. Wider fenders and quarter panels change more than exterior appearance. They determine wheel width, offset, tire profile, ride height, side-skirt depth, and how aggressive the rear diffuser needs to be. Build around the major visual element, not around the last accessory you found.

Choose the Moment You Want People to Remember

Show cars are judged by memory as much as detail. People remember the car with the uncompromising rear profile, the carbon fiber that looked almost liquid under the lights, or the wheel-and-fender fitment that made the whole Corvette look custom-built rather than assembled.

Pick that moment early. It may be the widebody silhouette. It may be a dramatic deck wing, a Black Widow-inspired rear treatment, or a color-and-carbon combination nobody can miss. Then support that choice throughout the build.

Proportion Is the Foundation of the Build

A widebody Corvette can look exotic, but only if the proportions are correct. Adding width without changing the wheel package leaves empty space and weakens the effect. Mounting oversized wheels without enough sidewall can make the car look like a display model rather than a performance machine.

The body, wheels, tires, and suspension should be planned as a system. Measure actual clearance after the body components are fitted, not from an internet fitment chart written for stock fenders. Factor in steering lock, suspension compression, tire growth at speed, and the clearance needed to drive onto a trailer or into a show field without destroying the front end.

Wheel finish matters, too. Forged wheels with a dark brushed center, exposed hardware, or a properly chosen polished lip can frame carbon fiber beautifully. The wrong finish can compete with the bodywork. On a loud paint color, a more controlled wheel finish usually gives the build balance. On black, gray, or white paint, the wheel can carry more visual drama.

Ride height should look intentional, not merely low. A Corvette that sits too high loses its menace. One that sits too low becomes impractical, risks damaging expensive aero, and can look awkward if the suspension geometry is compromised. The target is a tight, controlled relationship between tire and fender, with enough function left to move the car confidently.

Carbon Fiber Must Earn Its Place

Carbon fiber is not decoration. On a premium show build, it is material language. It adds texture, depth, and race-bred character, especially when it appears in components that naturally support the car’s aerodynamic profile: splitters, side skirts, diffusers, spoilers, wings, mirrors, and interior accents.

The trade-off is simple. Too much exposed carbon can make the car visually busy, especially when every panel carries a different weave direction, gloss level, or fit quality. Carbon looks strongest when it is used with purpose and installed with precision.

A hand-laid carbon-fiber widebody system creates an entirely different presence than cosmetic overlays. Replacement bumpers, widened fenders, quarter panels, skirts, spoilers, and splitters reshape the Corvette rather than simply decorating it. That is why a complete design family matters. The front, sides, and rear need to speak the same visual language.

Ivan Tampi Customs approaches this kind of transformation as automotive art, not generic replacement-part styling. The goal is a profile that carries the same intensity from the front corner to the rear diffuser, with surfaces that look engineered for the car instead of added after the fact.

Finish Quality Is What Separates a Build From a Project

Under outdoor sunlight, a rushed build can hide its flaws. Under event lighting and camera flashes, every weak edge becomes visible. Panel gaps, uneven clear coat, misaligned weave, adhesive residue, chipped hardware, and inconsistent gloss all stand out.

Fit every major component before paint or final finishing. Test hood, door, hatch, bumper, and wheel clearance more than once. If a widebody panel requires blending or bodywork, do not treat that stage as an afterthought. Great fabrication and paint preparation are where the build earns its credibility.

For exposed carbon, protect the surface with a high-quality UV-stable clear finish and maintain it properly. For painted components, match the texture and gloss from panel to panel. A flawless paint correction and ceramic protection will not fix poor bodywork, but they will make excellent work look even more expensive.

Build the Rear View Like It Is the Main Event

At most shows, people spend more time behind your Corvette than in front of it. The rear is where a build either delivers a final hit or fades out. A properly designed diffuser, exhaust layout, rear deck wing, taillight treatment, and widened quarter profile can create a finish people remember.

This is also where restraint matters most. The wing should match the aggression of the body. A tall GT wing has a race-car attitude and works best when the rest of the car has the width and aero presence to support it. A lower deck wing may be the better choice for a refined, high-end street show car.

Keep the exhaust centered and clean, with tips that suit the diffuser openings. Avoid visible clamps, hanging wiring, mismatched finishes, and soot-stained surfaces. At a car show, details below waist level are not invisible. They are where serious owners look first.

The Cabin Should Continue the Exterior Story

A show build does not need a fully custom interior, but the cockpit should not feel abandoned. A carbon-fiber steering wheel, coordinated trim, premium upholstery accents, and clean display integration can pull the whole experience together.

Do not overbuild the cabin if the exterior is the hero. A heavily customized interior can compete with an already aggressive widebody design. Choose a few high-impact elements, finish them correctly, and make sure the colors and materials belong with the exterior theme.

Cleanliness is non-negotiable. Remove personal clutter, worn floor mats, random air fresheners, and anything that makes a high-dollar build feel ordinary. At the show, bring microfiber towels, detail spray, glass cleaner, tire dressing that does not sling, and a small kit for fingerprints and emergency touch-ups.

Prepare for the Show, Not Just the Photos

A Corvette can look perfect in a controlled photo shoot and still arrive at an event looking unfinished. Build time into the schedule for alignment, paint correction, final fitting, road testing, and a proper pre-show detail. Never reveal a major body conversion for the first time on the same day it leaves the shop.

If the car is extremely low or carries a deep front splitter, trailer it. That is not a compromise. It is how you protect the work. Bring wheel chocks, ramps, cleaning supplies, and a plan for positioning the car once it is unloaded. A great stance is part of the presentation, and so is the way the car sits in its space.

The strongest Corvette car show build is not the one with the longest modification list. It is the one that looks fully resolved from twenty feet away, then rewards anyone who steps closer. Build for that second look. That is where the real impact lives.

Custom Vehicle Fabrication That Owns the Street

Custom Vehicle Fabrication That Owns the Street

A factory performance car can be fast, capable, and still disappear in a parking lot full of the same badge. Custom vehicle fabrication changes that equation. It takes the proportions, materials, aero language, and surface details of a build and turns them into a machine with its own identity – one that looks planted at a standstill and impossible to ignore in motion.

This is not about bolting random parts onto a car until it gets loud. The best builds are deliberate. Every widened fender, carbon-fiber splitter, vent, wing, and diffuser has to work together visually and physically. When the lines are right, the car looks like it was born that way. When they are wrong, even expensive parts can look like an afterthought.

What Custom Vehicle Fabrication Really Means

Custom vehicle fabrication is the process of designing, modifying, building, and fitting vehicle components that go beyond ordinary replacement parts. It can include widebody conversions, custom bumpers, molded fenders, carbon-fiber aero, metal work, composite work, mounting solutions, exhaust integration, wheel fitment, lighting revisions, and one-off interior or exterior details.

The word custom gets used too loosely in the aftermarket. A decal package is custom in the broadest sense, but it does not change the architecture of the car. Fabrication does. It reshapes the visual footprint and often requires serious decisions about clearances, body lines, panel transitions, mounting points, tire dimensions, and finish quality.

For a C7 Corvette, that might mean transforming the stock silhouette with replacement bumpers, widened front fenders and quarter panels, carbon side skirts, a rear diffuser, and a wing that gives the rear end real authority. On a Mustang, Camaro, BMW, Mercedes, Charger, SUV, or exotic, the principles remain the same: the finished build needs proportion before it needs attention.

Start With the Stance, Not the Shopping Cart

The strongest custom build begins with a clear point of view. Decide whether the car is headed toward exotic widebody aggression, track-inspired aero, refined carbon-fiber detail, or a show-car statement that cannot be mistaken for stock. Those directions can overlap, but they should not fight each other.

Stance is the foundation. Wheel diameter, width, offset, tire profile, ride height, and track width determine whether a body conversion looks muscular or awkward. A widebody panel with a narrow wheel sitting deep inside the arch loses the entire effect. On the other hand, an overly aggressive wheel and tire package can create rubbing, limited steering travel, damaged paint, or a car that is miserable to drive.

This is where serious planning earns its keep. The right setup accounts for suspension compression, steering lock, brake clearance, tire growth at speed, and the usable range of the vehicle. A show car can live lower and tighter than a daily driver. A street-driven Corvette that sees rough roads, steep driveways, and highway miles may need more ground clearance than a trailer-only build. There is no universal fitment spec because there is no universal mission.

Why Material Choice Changes the Entire Build

Not all aftermarket body components are created equal. Material selection affects weight, rigidity, finish, repairability, and the visual credibility of the final car.

Carbon fiber remains the material of choice for enthusiasts who want race-bred character with high-end finish potential. A properly made hand-laid carbon-fiber component carries visual depth that painted plastic simply cannot imitate. The weave, resin clarity, edge treatment, and surface finish all matter. Carbon can be left exposed for maximum impact or painted selectively when the build calls for a more integrated body-color treatment.

Fiberglass remains useful for certain large-format custom shapes and prototype work, particularly when extensive reshaping is required. It can be more forgiving to modify, but quality varies dramatically. Poorly made fiberglass can demand substantial prep work before paint and may struggle with panel consistency.

ABS and polyurethane have their place on daily-driven cars because they can offer impact resistance and flexibility. Yet they do not deliver the same exotic visual language as visible carbon fiber, and they may not be the right choice for a flagship, high-detail widebody build. The right material depends on the intended finish, the driving environment, the budget, and how far the owner wants to push the design.

Fitment Is the Difference Between Premium and Problematic

A dramatic body conversion is only as good as its fitment. This is where custom vehicle fabrication separates serious craftsmanship from parts swapping.

Panel gaps must look intentional. Doors need to open without striking a widened quarter. Tires need room through the full range of suspension travel. A front splitter has to mount securely enough to survive road speed without vibrating like an afterthought. Rear bumper, diffuser, exhaust tips, and lighting all need to land in the same visual conversation.

Experienced fabricators also look beyond the photo angle. A build may appear perfect from the front three-quarter view while hiding poor door transitions, exposed hardware, uneven weave, distorted reflections, or incomplete wheel-well finishing. Premium work holds up under direct sunlight, close inspection, and the low camera angles that reveal everything at a car show.

Before committing to any body package, verify the exact model year, trim, bumper configuration, and required supporting parts. A component designed for one Corvette configuration may not directly transfer to another. Ask whether a kit includes replacement panels or overlays, whether cutting is required, what mounting hardware is involved, and what prep is expected before paint or final finishing. Precision starts before the first panel arrives.

Build the Aero as a System

A front splitter, side skirts, rear diffuser, deck wing, and GT wing can create a complete visual system. Installed without a plan, they can also make a car look busy and unbalanced.

The front of the vehicle establishes the first impression. A lower, wider bumper and splitter can make the car appear faster and more planted, but only if the side profile carries that low visual line into the skirts. At the rear, a diffuser and spoiler or wing need enough presence to visually balance the enlarged front. The goal is not to put carbon on every available surface. The goal is to create pressure, movement, and attitude from nose to tail.

Functional aerodynamic gains depend on actual design, mounting rigidity, air management, vehicle speed, and the rest of the package. A wing is not automatically functional just because it looks like it belongs at a road course. That does not make visual aero less valuable. It means the owner should be honest about the build’s purpose. A show-focused car can prioritize shape and finish. A track-focused car must prioritize tested geometry, structural mounting, cooling, and balance.

The Fabrication Process Should Never Be Rushed

Big visual transformations demand a disciplined sequence. First comes the concept and component selection. Then the shop confirms fitment, evaluates the vehicle’s existing condition, and establishes wheel and suspension targets. Panels are test-fitted before finish work begins, because paint or clear coat should not be used to hide an alignment issue.

From there, the build may involve trimming, reinforcement, custom brackets, bonding, fastening, bodywork, paint preparation, color matching, clear coating, wet sanding, polishing, and final reassembly. The exact path depends on the materials and the level of finish requested. Exposed carbon requires particular care because its surface is part of the statement. A weak clear coat, poor edge finish, or mismatched weave direction can cheapen an otherwise serious piece.

The smartest owners set aside budget and time for the work around the parts. Installation, paint, alignment, suspension adjustments, wheel fitment, ceramic protection, and unexpected fabrication needs are not side details. They are what make the build look complete.

Choose a Design Language Worth Committing To

The aftermarket is packed with generic shapes. The cars that get remembered have a recognizable design language: a deliberate front-end expression, muscular body transitions, and carbon-fiber details that look engineered rather than attached.

That is why limited-edition systems and designer-led aero matter. A cohesive kit gives the build a signature. Ivan Tampi Customs built its reputation around that kind of dramatic, exotic-inspired presence, including the XIK widebody direction for the C7 Corvette. The appeal is not just added width. It is the way a complete design can turn a familiar American sports car into automotive art with a different silhouette from every angle.

Exclusivity also protects the visual impact of the investment. A car does not need to be covered in one-off parts to stand apart, but it should avoid the copy-and-paste look. Select components with a shared design vocabulary, then finish them with the same level of intent.

Make the Build Work in the Real World

A custom car should be exciting to own, not stressful every time it leaves the garage. Consider driveway angles, local road quality, parking habits, weather exposure, detailing requirements, and where the vehicle will be serviced. Deep splitters, aggressive side skirts, and wide wheels can demand more attention. That is part of the territory, but it should be a conscious trade-off.

If the car is driven often, prioritize secure mounting, adequate ground clearance, quality protective film or coating, and a wheel-and-tire package that can handle real road conditions. If it is a weekend showpiece, you may accept a more extreme ride height, more exposed carbon, and a more uncompromising aero package. Neither approach is better. The right answer is the one that matches how the car will actually live.

The right custom build does not ask for permission to be noticed. Choose the components, materials, and fabrication standards that make every angle look intentional, then give the car a presence worthy of the space it takes up.

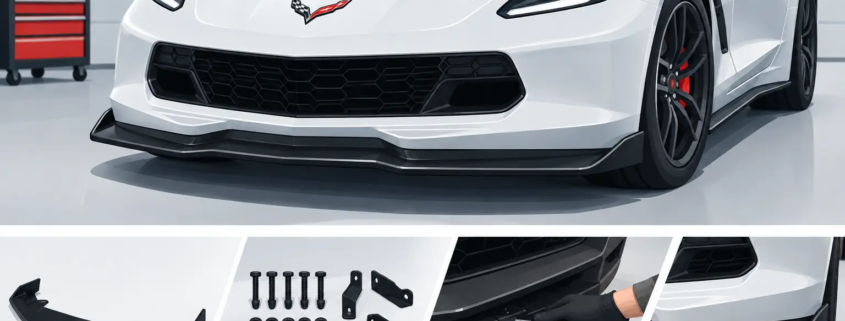
How to Install C7 Corvette Splitter the Right Way

How to Install C7 Corvette Splitter the Right Way

A C7 Corvette splitter is not a cosmetic afterthought. It is the first thing people see when your car rolls in low, wide, and unapologetic – and the first thing that takes a hit when installation is rushed. Knowing how to install C7 Corvette splitter hardware correctly protects the finish, keeps the aero line sharp, and gives the front end the planted, race-inspired stance it was built to wear.

Whether you are fitting painted ABS, fiberglass, or hand-laid carbon fiber, the standard is the same: tight panel gaps, centered placement, concealed hardware where possible, and enough support to handle real street miles. This is a precision job. Treat it like one.

Before You Install a C7 Corvette Splitter

Start by confirming the splitter matches your exact bumper. A C7 Stingray, Z06, Grand Sport, and ZR1-inspired front conversion do not all share the same lower profile or mounting points. Even within one model range, aftermarket bumpers and existing front lips can change how a splitter sits. Never force a part into position because it looks close.

Inspect the splitter before bringing it near the car. On a premium carbon-fiber piece, look at the weave direction, clear coat, mounting flange, and every pre-drilled hole. Set it on a soft moving blanket or padded work surface. Do not place carbon fiber face-down on concrete, cardboard with staples, or a dirty shop floor. One careless drag can mark a finish that deserves better.

Clean the underside of the bumper thoroughly. Road film, tire dressing, and old adhesive residue can prevent double-sided tape from bonding if your splitter design uses it as an anti-rattle aid. Isopropyl alcohol on a clean microfiber works well for final surface prep. Let the area dry completely before test-fitting.

Your installation area matters too. Work on level ground with strong lighting. A drive-on lift is ideal because it supports the Corvette naturally while giving you room underneath. If you are using ramps or a floor jack, use properly rated jack stands at the factory lift points. Never trust a hydraulic jack alone under a low Corvette.

Tools that make the job cleaner

Most installations call for basic hand tools: a socket set, ratchet, trim clip tool, drill and correctly sized drill bits if the kit requires new holes, painter’s tape, measuring tape, masking marker, microfiber towels, and safety glasses. A second person is not optional on longer splitters. They can hold the centerline while you check each side, preventing the common mistake of tightening one corner and discovering the entire part has shifted.

If your splitter uses bolts, washers, lock nuts, or brackets, lay the hardware out first. Match every fastener to its intended location before you start. Do not substitute random hardware-store screws for supplied stainless hardware unless you know the load requirement and thread engagement are correct.

Test-Fit Before You Drill or Tape

The difference between a show-car installation and a compromised one usually happens before the first fastener goes in. Hold the splitter against the lower bumper with a helper and study it from several angles. Check the front edge, both corners, wheel-well transitions, and the center opening. The splitter should follow the factory bumper line without being bowed upward, pulled downward, or tensioned at either end.

Use painter’s tape to mark the center of the bumper and the center of the splitter. Align those marks first. Then measure from a fixed point on each side of the car, such as the edge of the lower grille opening or a bumper body line, to confirm the splitter projects evenly. Your eyes are useful, but measurements expose small errors that become obvious once the car is back on the ground.

On a carbon-fiber splitter, avoid overtightening during this stage. Carbon fiber is exceptionally strong for its weight, but its mounting flange can crack if hardware pulls it against an uneven surface. If a hole does not line up, stop and find out why. The problem may be a bumper variation, an old damaged mounting tab, or a part that needs minor professional adjustment. Forcing it is not craftsmanship.

How to Install C7 Corvette Splitter Hardware

Once your test-fit is centered and the mounting holes line up, begin with the center fasteners. Install them loosely enough to let the splitter move slightly. Then work outward, alternating from left to right. This distributes pressure evenly across the mounting surface and helps the splitter seat against the bumper without creating a wave or twist.

If the splitter uses factory holes and push clips, remove the original clips carefully with a trim tool rather than pulling them by hand. Reuse only clips that are undamaged and still grip firmly. For bolt-on installations, use washers where supplied to spread the load across the mounting flange. Nylon lock nuts or thread locker can help prevent vibration from loosening hardware, but use thread locker only where the manufacturer allows it.

Some splitters include support rods or braces. These are not just visual motorsport theater when the splitter has a deep extension or sees higher speeds. Mount the brackets exactly where instructed, ensuring the load is carried by a stable bumper structure rather than thin plastic alone. Support rods should be adjusted evenly, with no side pulling harder than the other.

If drilling is required, mark every hole while the splitter is held in its final position. Remove the splitter, verify the marks again, then drill a small pilot hole before stepping up to the final bit size. A pilot hole gives you more control and reduces the chance of the bit wandering across the bumper. Drill slowly and support the material from behind when possible.

Do not drill through the bumper with the splitter mounted unless the manufacturer specifically directs you to do so. You risk scratching the finish, damaging the carbon fiber, or elongating a hole that should stay precise.

Tighten in stages, not all at once

After all hardware is installed, tighten it in stages from the center outward. The goal is secure contact, not brute force. Stop when the splitter is firmly seated and the washer is snug. If the flange begins to distort, back off and inspect the fitment. A premium aero component should look integrated, not clamped into submission.

Once tight, step back several feet and look at the front end straight on. Check that each corner has the same projection and that the centerline still matches. Then get low and inspect from the side. The splitter should complement the Corvette’s body line, not point upward or sag at the outer edges.

Final Checks Before the First Drive

Turn the steering wheel lock to lock and verify there is no tire contact, especially if your C7 is lowered or running aggressive wheel and tire fitment. Check that the splitter clears the wheel-well liner, brake ducts, and any aftermarket canards. Look underneath for loose tabs, exposed hardware, or brackets near moving components.

Before driving, account for your new approach angle. A splitter changes the way you enter driveways, parking garages, loading ramps, and gas stations. Approach steep entrances diagonally whenever space allows. Slow down over road crowns and speed bumps. Carbon fiber makes a statement, but it is not an invitation to test it against every concrete curb in town.

After the first 25 to 50 miles, inspect the hardware again. Street vibration, heat cycles, and initial settling can reveal a fastener that needs a small adjustment. Recheck after your first highway run, especially with a deeper aero profile or support rods.

Keep the Finish Worth Looking At

Wash the splitter with the same care you give the rest of the car. Use pH-balanced car soap, soft wash media, and clean microfiber towels. Avoid harsh degreasers on exposed carbon-fiber clear coat unless the product specifically approves them. For carbon fiber, a quality paint sealant or ceramic protection can make bug removal easier and preserve the depth of the weave.

If the splitter scrapes, inspect more than the visible surface. A shallow mark may be cosmetic, but a deep impact can damage a mounting point or create a crack near a fastener. Catching that early is far better than losing a corner at speed.

A properly installed splitter does more than sharpen the nose of your C7. It sets the visual attitude for everything behind it. Take the extra time to align it with purpose, secure it with discipline, and let the Corvette arrive with the kind of road presence Ivan Tampi Customs was built to celebrate.

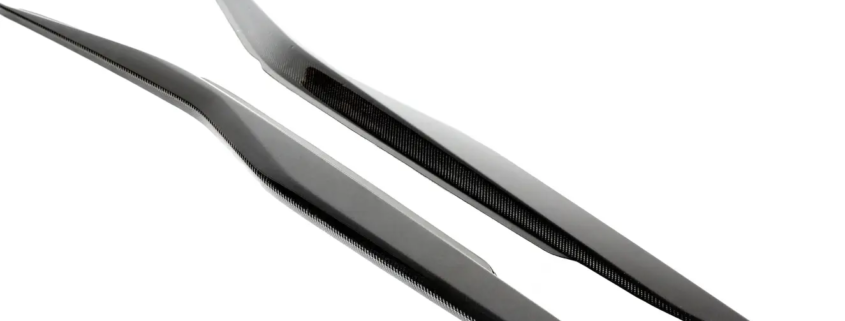
C7 Corvette Carbon Fiber Side Skirts That Hit Hard

C7 Corvette Carbon Fiber Side Skirts That Hit Hard

A C7 can have forged wheels, a loud exhaust, and a clean stance, then still look unfinished from the side. That is where C7 Corvette carbon fiber side skirts earn their place. They pull the body visually closer to the pavement, stretch the car’s profile, and give the Corvette the low, planted attitude its factory lines are begging for.

This is not a minor trim upgrade when the design is right. Side skirts control the visual transition between the front splitter, fenders, rear quarters, and diffuser. On a car built to turn heads, that transition matters.

Why C7 Corvette Carbon Fiber Side Skirts Change the Entire Build

The C7 Corvette has one of the strongest factory silhouettes in modern American performance. Its long hood, sharp cabin, and muscular rear haunches already carry exotic influence. But the rocker area is relatively restrained from the factory. Carbon fiber side skirts add the missing lower edge, giving the chassis a more deliberate and aggressive footprint.

The effect is strongest at a three-quarter angle. A properly shaped skirt creates a darker, sharper shadow line below the doors and visually lowers the car without touching the suspension. It makes the front splitter look wider and gives the rear diffuser more visual authority. The result is not simply “more carbon.” It is a body line with purpose.

That is why a side skirt should never be selected as an isolated accessory. If your Corvette has an understated street build, a clean skirt with a controlled profile may be the right move. If the car carries wide fenders, deep aero, a tall wing, or a full show-car stance, the skirts need enough presence to hold their own. A thin, generic rocker extension can disappear beneath an otherwise serious build.

Carbon Fiber Is More Than a Surface Finish

Real carbon fiber brings an unmistakable visual depth that painted plastic cannot duplicate. The weave catches light differently from every angle, shifting from subtle to dramatic as the car moves. On a black C7, carbon can create a sinister layered finish. On a white, red, yellow, or gray Corvette, it creates sharp contrast and gives the lower body a race-inspired edge.

Construction matters as much as appearance. Hand-laid carbon fiber parts are valued because the material itself becomes part of the design statement. The weave, resin finish, panel consistency, and edge treatment all influence whether the final result looks premium or looks like an afterthought bolted onto a premium car.

For a vehicle that sees road miles, quality clear coat protection is essential. Carbon fiber lives low on the car, where it is exposed to road grit, tire spray, water, and UV. Treat it like the high-end exterior finish it is. Regular washing, careful drying, paint protection film in high-impact areas, and a quality sealant or ceramic coating can help preserve its depth and gloss.

Fitment Comes Before the Flex

A carbon fiber side skirt can look incredible in product photos and still be wrong for your specific C7. Before choosing a set, confirm the exact model year and body configuration. Corvette fitment is not a place for assumptions, especially when the car already wears aftermarket bumpers, fender extensions, widebody panels, or modified rocker areas.

The first question is whether the skirt is designed for a standard-body Stingray, Z51, Grand Sport, Z06, or a widebody conversion. The second is whether it replaces an existing rocker component, mounts beneath the factory rocker, or requires additional adaptation. Those details determine the final body line, ground clearance, and installation approach.

A serious build should also account for how the skirt meets the rest of the aero package. The front edge should visually connect to the splitter or front canards. The rear should finish cleanly near the quarter panel and diffuser. When those lines fight each other, even expensive carbon fiber can look mismatched. When they flow, the entire car looks designed rather than assembled.

Standard Body or Widebody: Build Accordingly

Standard-body C7s benefit from side skirts that emphasize length without making the rocker area appear too heavy. The goal is to enhance the factory proportions, not overpower them. A skirt with a crisp lower edge and measured outward extension can deliver the right amount of drama for a street-driven car.

Widebody C7s need more visual muscle. Once the fenders and rear quarters push outward, the rocker area must bridge that added width. This is where a side skirt becomes structural to the design language. It must carry the eye from the widened front fender to the rear quarter without leaving a narrow, disconnected gap in the middle.

Ivan Tampi Customs approaches this kind of transformation as automotive art, not a catalog of interchangeable pieces. That mindset is especially relevant to side skirts because they sit at the center of the vehicle’s profile. On an XIK-inspired widebody build, they are part of the statement, not an accessory added at the end.

The Stance Trade-Off Nobody Should Ignore

Lower side skirts look better because they sit closer to the road. They also demand more awareness. Driveway entries, steep parking ramps, road crowns, speed bumps, trailer loading, and poorly maintained streets can all become potential contact points.

That does not mean a low skirt is impractical. It means the build needs to match the way you use the car. A show-focused Corvette that travels by enclosed trailer can prioritize maximum visual aggression. A weekend car that regularly sees city streets may need a slightly more forgiving profile. A daily-driven C7 may benefit from a design that maintains a strong visual drop without extending excessively below the factory rocker line.

Suspension setup changes the equation too. A Corvette on lowering springs or coilovers may look perfect in a static photo but need careful clearance planning in real-world conditions. Check clearance with the driver in the car, with the steering turned, and with the suspension loaded. The right fitment is not just about standing still at a meet. It has to survive the exit.

Installation Is Where Premium Parts Can Lose Their Presence

Even the best carbon fiber part can look wrong with uneven gaps, visible fasteners in the wrong locations, poor alignment, or rushed prep. Side skirts run nearly the full length of the door opening, which makes even a slight mounting error obvious.

Professional installation is the smart call for a high-end build, particularly if the car has a custom body kit or painted surfaces that require precise protection. The installer should mock up both sides before final fastening, verify symmetry against the body lines, and inspect door clearance before committing. On carbon fiber, drilling or trimming without a plan is expensive confidence.

If you are installing at home, work slowly and treat mock-up time as part of the installation, not a delay. Use painter’s tape to establish reference lines, compare both sides repeatedly, and avoid overtightening hardware against composite material. The goal is a clean, flush appearance that looks factory intentional from six feet away and flawless up close.

How to Build Around Carbon Fiber Side Skirts

Side skirts become more powerful when the rest of the Corvette supports them. The strongest combinations usually carry carbon or gloss-black visual weight at both ends of the vehicle. A front splitter establishes the leading edge. Side skirts extend that attitude through the doors. A rear diffuser finishes the lower silhouette. Add a deck spoiler or GT wing based on how extreme the build needs to be.

Wheel choice is equally important. Deep concave forged wheels, correct offsets, and a purposeful ride height make the skirts look integrated rather than added on. A weak wheel fitment can undercut the entire side profile, while a properly planted setup makes the Corvette look wider, lower, and more expensive before anyone notices the badge.

Color coordination should be intentional. Exposed carbon pairs naturally with black accents, smoked lighting, dark wheels, and satin details. A brighter wheel finish can also work, but it should create deliberate contrast. The best builds do not throw every finish at the car. They choose a visual hierarchy and commit to it.

Choose the Skirt That Matches the Statement

Not every C7 Corvette needs the same level of aero. The right carbon fiber side skirt depends on whether you want an elevated factory-plus look, a street-built performance profile, or a full widebody presence that dominates a show field. The material alone does not create the impact. Proportion, fitment, and how the part connects to the rest of the car do.

Choose a design with enough authority to match your Corvette’s ambition, install it with precision, and build the rest of the profile around it. When the doors close and that carbon line runs cleanly from front wheel to rear quarter, the car stops looking modified and starts looking inevitable.

Best Corvette C7 Widebody: What Sets It Apart

Best Corvette C7 Widebody: What Sets It Apart

A C7 Corvette does not need help looking fast. It needs a reason to look unforgettable. The best Corvette C7 widebody is not the one with the most random add-ons or the loudest paint scheme. It is the build that changes the car’s entire silhouette with purpose – wider haunches, sharper aero, proper wheel fitment, and proportions that make the factory body look almost restrained.

A real widebody conversion turns the C7 into something more exotic, more aggressive, and far more personal. Done right, it does not look like a collection of aftermarket parts. It looks like the car arrived from another level of Corvette design.

What Makes the Best Corvette C7 Widebody?

The answer starts with design continuity. A widebody is judged from every angle: head-on at a show, rolling down the highway, backed into a parking space, and photographed low from the rear quarter. If the front bumper, fenders, side skirts, quarter panels, and rear fascia are not speaking the same visual language, the car loses impact.

The strongest C7 widebody designs create a continuous line from the front wheel opening through the side profile and into the rear haunch. The widened body should feel intentional, not inflated. There is a major difference between adding width and sculpting width. The first makes a Corvette larger. The second makes it look like a custom-built supercar.

That is why a complete system usually delivers a more convincing result than piecing together unrelated components. Matching parts preserve the same surface tension, vent style, edge treatment, and visual aggression across the vehicle. The result is a C7 that carries authority from nose to tail.

Replacement Panels Change the Entire Impression

A replacement bumper or properly engineered panel is a different proposition from a simple overlay. Overlays can serve a purpose for targeted styling upgrades, but a show-level widebody conversion needs a foundation that controls the full shape of the car.

Replacement front and rear bumpers can establish deeper openings, more dramatic geometry, and transitions that actually belong with widened fenders. Replacement quarter panels allow the rear body line to grow outward with a cleaner, more integrated finish than a surface-mounted flare. This is where the transformation becomes believable.

For owners chasing a vehicle that gets photographed, remembered, and recognized, body integration matters more than a single dramatic piece.

Carbon Fiber Is More Than a Finish

Carbon fiber has become one of the most recognizable materials in high-end automotive styling, but not all carbon components deliver the same experience. The weave may catch attention, yet the construction, finish quality, panel consistency, and fitment are what separate premium automotive art from a part that looks impressive only in product photos.

Hand-laid carbon fiber brings a level of craftsmanship that suits the C7 platform particularly well. The Corvette already blends American muscle-car force with supercar proportions. Carbon fiber adds technical character without softening that edge. It gives splitters, spoilers, skirts, diffusers, and body panels a race-inspired visual language that works whether the car is finished in a deep metallic color, exposed carbon, or a full custom wrap.

There is also a practical trade-off. Carbon fiber deserves careful installation, thoughtful panel alignment, and regular finish care. A widebody Corvette built with premium materials is not a disposable style exercise. It is an investment in a visual identity. Owners who want the best result should expect to treat the build accordingly.

Exposed Weave or Painted Carbon?

There is no universal answer. Exposed carbon fiber makes the material part of the statement. It works especially well when the car carries complementary carbon details on the splitter, wing, hood, roof, mirrors, and interior. The texture gives the body a technical, high-dollar presence before the engine ever starts.

Painted carbon is the move when the goal is a cleaner, more unified color presentation. It lets the widened shape do the talking while retaining the benefit of composite construction beneath the paint. Many of the strongest builds use both: painted primary panels with exposed carbon aero pieces that frame the bodywork.

The decision should come from the intended personality of the car. A dark exposed-carbon build can feel sinister and track-bred. A color-matched widebody with gloss-carbon accents can feel more like a custom exotic. Both can be exceptional when the details are coordinated.

Wheel Fitment Is Where Widebody Builds Win or Lose

A widebody conversion without the right wheels is an unfinished statement. The added body width creates room for a more commanding wheel and tire package, but filling that space correctly requires planning. A wheel that sits too far inward leaves a shadowy, underwhelming gap. One that pushes too far outward can create clearance issues, damage paint, and make an expensive build look careless.

The ideal setup puts the wheel face and tire sidewall in a relationship with the new fender line that feels deliberate. On a street-driven C7, that balance must account for suspension travel, steering angle, tire profile, ride height, and real-world road conditions. On a show-focused build, the stance can become more aggressive, but fitment still needs to look engineered rather than forced.

Forged wheels are a natural partner for a premium C7 widebody because they allow greater control over sizing, offsets, finish, and spoke design. More important than brand labels, however, is choosing a wheel architecture that supports the body. Deep concavity and directional spoke patterns can amplify the width of the rear quarters. A wheel design that is too delicate may get visually swallowed by a dramatic widebody.

Before ordering wheels, finalize the body kit, suspension plan, brake package, and tire direction. This prevents the common mistake of buying wheels for a factory-body Corvette and trying to make them work after the body grows around them.

Aero Must Support the Shape

The front splitter, side skirts, rear diffuser, deck spoiler, and GT wing should not compete with the widebody. They should sharpen it.

A low front splitter gives the nose a planted, predatory look. Side skirts visually lower the center of the car and connect the widened front and rear sections. At the back, a diffuser brings depth beneath the bumper, while the wing or spoiler sets the final attitude. A subtle deck spoiler may suit a polished exotic-inspired build. A larger GT wing brings a more unapologetic track-car presence.

This is a place where restraint has value. If every edge is oversized, the eye has nowhere to land. The best builds create hierarchy: the widebody establishes the silhouette, the wheels fill the stance, and the aero details add precision.

Fitment Is the Difference Between Custom and Compromised

Even the most striking design can be undermined by poor installation. Uneven panel gaps, rushed trimming, mismatched weave orientation, visible hardware where it does not belong, and inconsistent paintwork will pull attention away from the design for all the wrong reasons.

A serious C7 widebody project should be approached as a complete build, not a weekend of unboxing parts. Test-fitting, surface preparation, panel alignment, paint or finish planning, and final assembly all matter. Depending on the scope, professional installation may be the right choice, especially when replacement bumpers, widened quarter panels, and custom wheel fitment are involved.

The XIK Widebody Kit from Ivan Tampi Customs was created for owners who want that complete visual takeover: a limited-edition, 14-piece hand-laid carbon-fiber system with replacement bumpers, widened fenders and quarter panels, side skirts, spoilers, and splitters designed to read as one unmistakable machine.

Choose the Build That Matches Your Corvette’s Mission

The best C7 widebody for a weekend canyon car is not always the same as the best one for a SEMA-level display build. A daily-driven Corvette may need more ride-height clearance, a less extreme splitter, and wheel-and-tire choices that tolerate rough pavement. A dedicated show car can pursue a lower stance, exposed weave throughout, larger aero, and a more radical finish.

Budget matters too, but the wiser question is where the money creates the most impact. A complete, coherent conversion with correct fitment usually carries more presence than a car covered in individually expensive parts that do not share a design direction. Start with the body, then build the wheels, aero, finish, lighting, and interior around it.

A C7 widebody should never feel like an apology for not buying something exotic. Built with the right proportions, carbon-fiber craftsmanship, and ruthless attention to fitment, it becomes the car the exotics notice when they pull into the show.